How to Watermark Images in ImagiTool
ImagiTool Team
Add text or logo watermarks in bulk with layers, anchor positioning, presets, and export controls.
ImagiTool makes it easy to watermark many images in one run. In this guide, you will learn how to build a reusable watermark setup and export clean branded files.
What You'll Learn
- How to add text and logo watermark layers.
- How to control anchor, margin, offset, and scale.
- How to save presets and export your full batch.
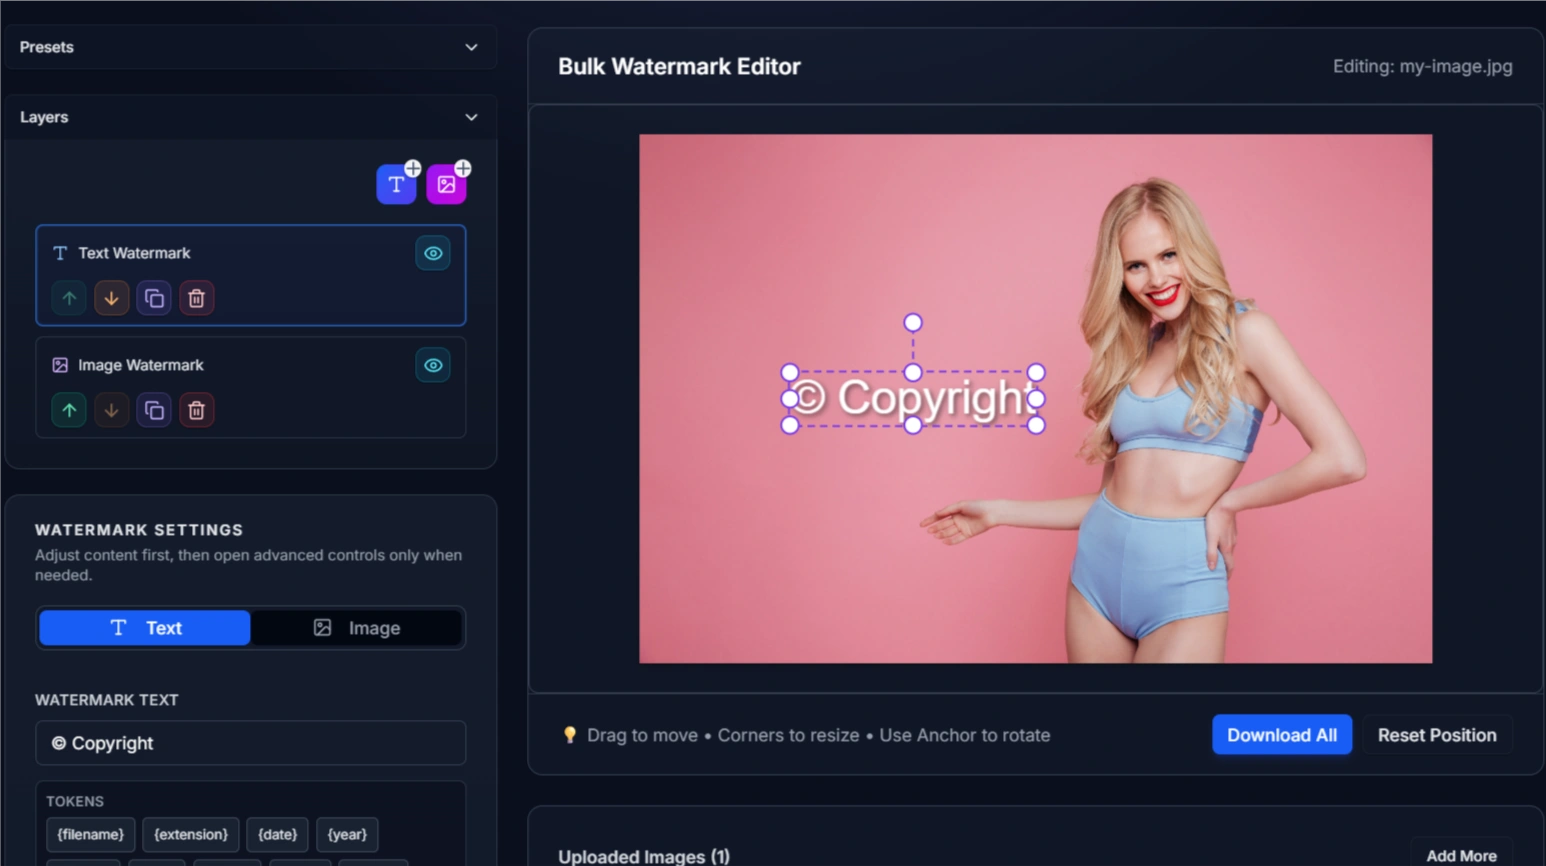
Suggested screenshot: Watermark Settings panel with text and image layer options visible.
Step-by-Step Guide
Step 1: Upload Your Batch
- Open Watermark Image.
- Drag and drop your files into the uploader.
- Select one image preview to tune your watermark setup.
Step 2: Build Your Watermark Layer
- In Watermark Settings, choose Text or Image.
- For text, set font, color, opacity, and rotation.
- For logo marks, upload your watermark image and set scale.
Step 3: Position It Precisely
- Use the Anchor Grid for 9-point placement.
- Adjust margin and offset for safe spacing.
- Use Numeric Transform when you need exact values.
Step 4: Save Preset and Export
- Save your setup in Presets for repeat jobs.
- Set output format, quality, and filename template in Export Options.
- Click Download All to export the full batch.
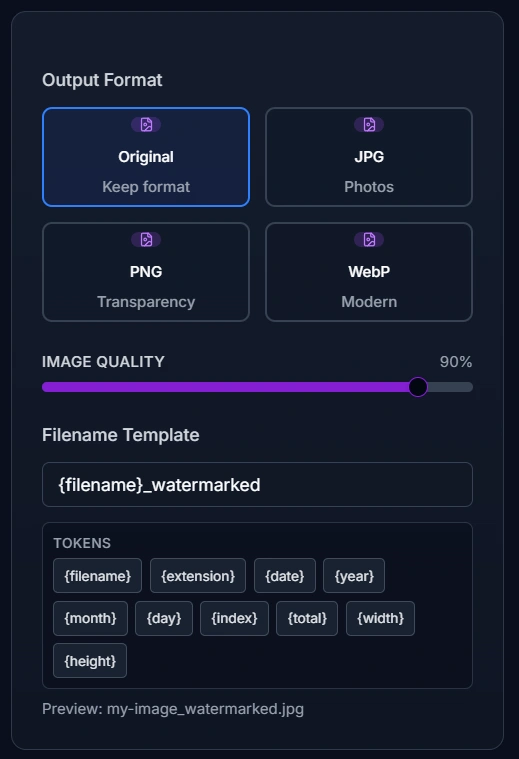
Suggested screenshot: Anchor grid selection, preset save area, and export settings in one view.
Key Tools Explained
- Layers -> Stack text and logo marks in one composition.
Need a quick refresher before building complex watermark stacks? See Introduction to Layers and Groups.
- Presets -> Reuse brand-safe settings across future batches.
- Anchor Grid -> Locks consistent placement on every image.
- Pattern -> Repeats text marks for stronger content protection.
- Filename Template -> Adds tokens like
{filename}and{date}to outputs.
Pro Tips
- Use lower opacity for photos and higher opacity for product shots.
- Keep watermark inside safe margins to avoid edge clipping.
- Use percent-based scale mode for mixed image dimensions.
- Save one approved preset before processing large batches.
- Test one file first, then run the full export.
Common Issues
Why is Download All disabled?
Add at least one image and a valid watermark layer first.
Why does my logo look too large on some files?
Switch scale mode and tune it with a mixed-size test batch.
Why is text hard to read?
Increase contrast, add a subtle stroke, or raise opacity.
Why are output names messy?
Use filename template tokens and preview the final naming pattern.