How to Get Started with ImagiTool
ImagiTool Team
Use ImagiTool as a complete image editing platform with connected creative and production workflows.
ImagiTool is a complete image editing platform with connected creative and production workflows. In this guide, you will learn how to move from creative editing to production-ready outputs in one browser workflow.
What You'll Learn
- How to finish single-photo edits and export inside the Photo Editor Workspace.
- When to use utility tools for batch production workflows.
- How to ship final images for web, social, and client delivery.
Review the Basics First
If this is your first time in the editor, start with Get to Know the Photo Editor before running your first workflow.
Step-by-Step Guide
Step 1: Pick Your Starting Path
- Use Photo Editor Workspace for single-photo work from edit to export.
- Use focused tools like Compress Image, Resize Image, or Convert to JPG when processing batches.
- Start with the final use case first, then choose the right route.
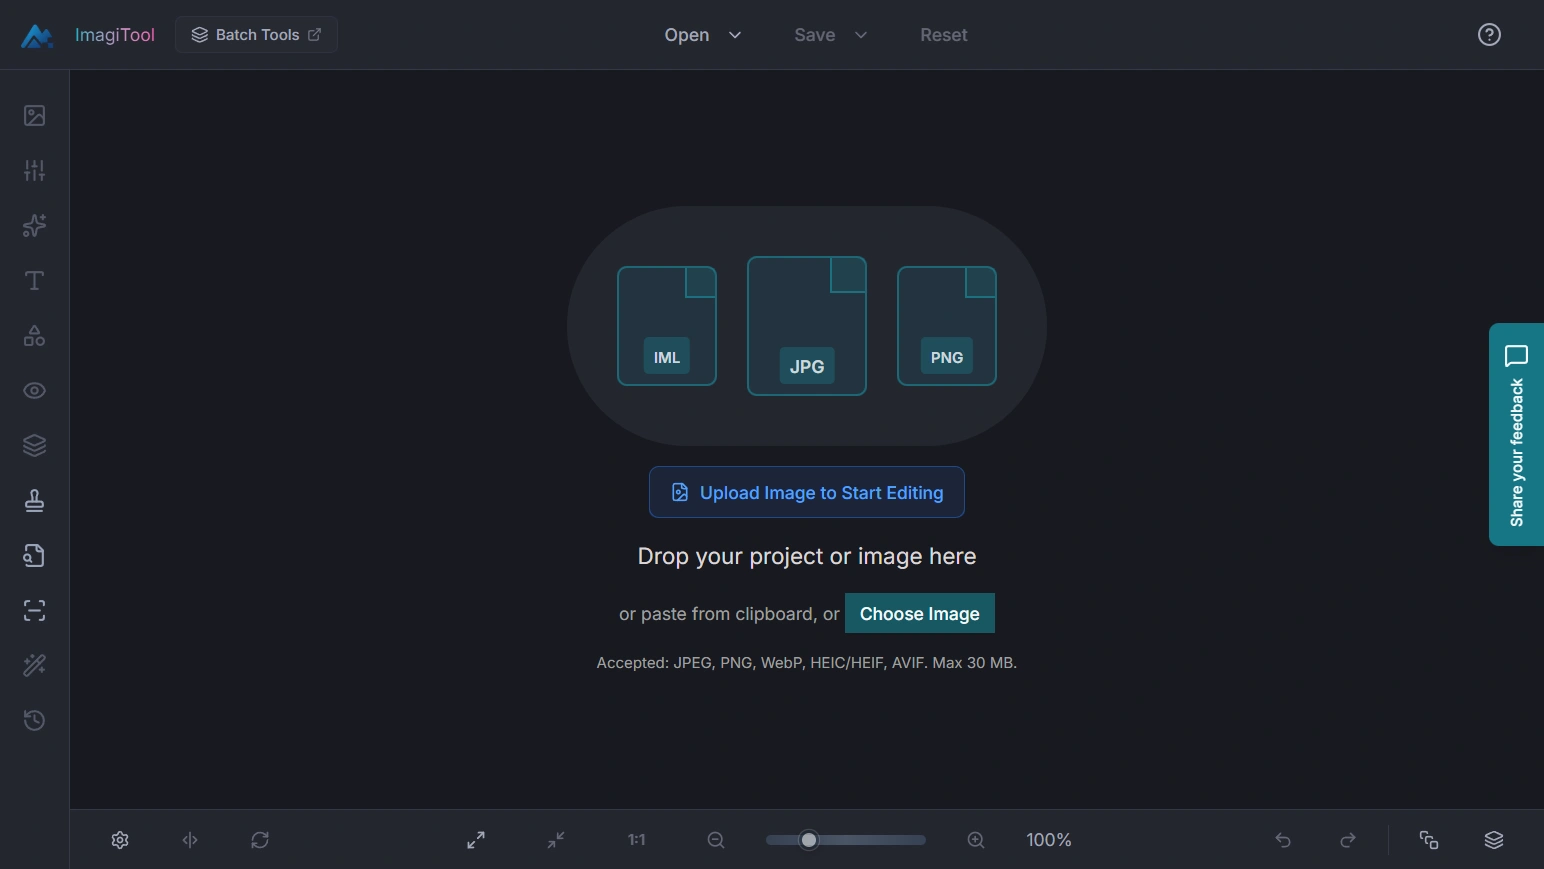
Step 2: Upload Files
- Drag and drop your file or click to upload.
- Supported upload formats are JPEG, PNG, WebP, AVIF, and HEIC/HEIF.
- For single photos, stay in the workspace and complete the full flow there.
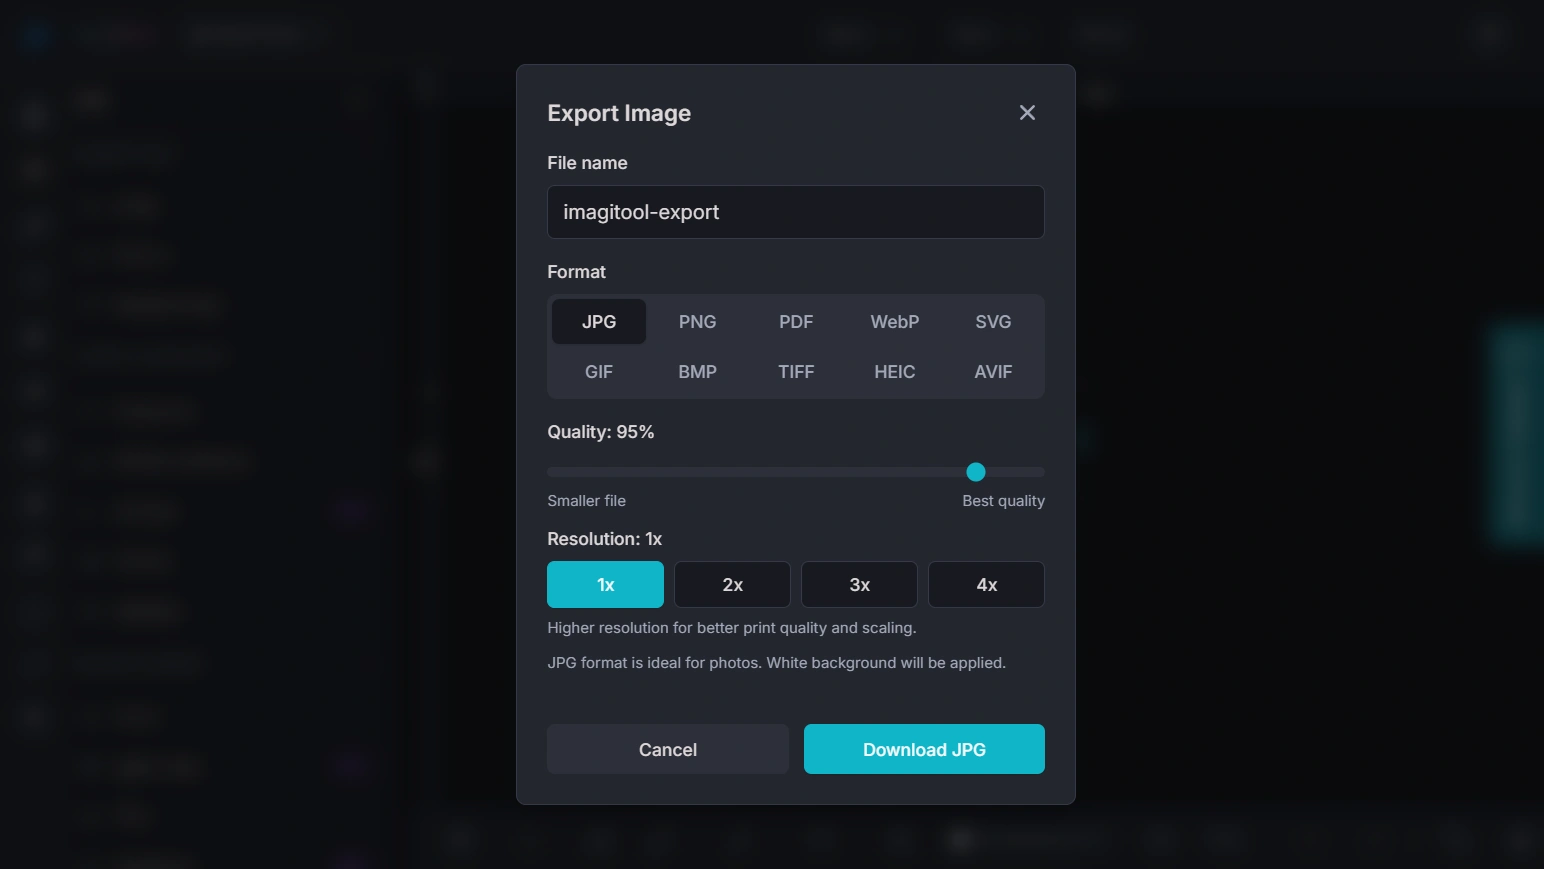
Step 3: Set Output Options
- In the editor, handle crop, adjustments, and effects before export.
- In batch utility tools, set quality, dimensions, and format for each output target.
- Keep aspect ratio enabled when resizing for social posts or web layouts.
- For watermark tasks, confirm position and opacity before final export.
Step 4: Process and Export
- Start processing and wait for completion.
- Review quality and file size against your publishing requirements.
- For single images, export directly from the workspace without leaving it.
- Use utility tools when you need consistent output across multiple files.
Key Tools Explained
- Photo Editor Workspace -> Handles single-photo editing and direct export in one place.
- Resize Image -> Batch-prepares custom, social, and fixed-size dimensions.
- Rotate Image -> Fixes orientation across one file or many files.
- Mirror Image -> Flips images for alternate composition and layout fit.
- Convert DPI -> Sets print or web DPI targets with preset values.
- Compress Image -> Optimizes JPG, PNG, WebP, GIF, SVG, and BMP output sizes.
- Reduce Image in KB -> Helps hit strict upload limits like 200KB or 100KB.
- Convert to JPG -> Converts mixed formats, including HEIC and RAW inputs, to JPG.
- Convert to PNG -> Creates PNG outputs for transparency-friendly workflows.
- Convert to WebP -> Generates efficient web delivery files.
- Convert to HEIC -> Produces HEIC outputs for compatible workflows.
- Convert to AVIF -> Produces AVIF outputs for modern compression efficiency.
- RAW File Viewer -> Opens and previews RAW camera files in-browser.
- RAW Converters -> Converts RAW inputs to JPG, PNG, WebP, and HEIC.
- Watermark Image -> Applies consistent marks across image batches.
- Remove Background -> Available as a listed utility page and currently marked coming soon.
Pro Tips
- For one image, finish everything in the workspace and export there.
- For many images, use utility tools in this order: resize, convert, compress.
- Use JPG for photos, PNG for transparency, and WebP for modern web delivery.
- Save one approved output profile and reuse it for consistent batch delivery.
- Keep Keyboard Shortcuts open while learning the editor workflow.
Common Issues
Do I need to leave the workspace to export one photo?
No. For single-photo workflows, you can edit and export directly inside Photo Editor Workspace.
When should I use utility tools?
Use utility tools for batch workflows when you need to process many files with consistent output settings.
Why is my image not uploading?
Supported formats differ by tool. Try a common type like JPG or PNG, or convert the file first using Convert to JPG.
Why does my output look blurry?
Avoid enlarging small source images. Keep aspect ratio locked and lower compression strength for quality-sensitive outputs.
Why did my watermark look too strong?
Reduce watermark opacity and test a corner placement before processing your full batch.