Bokeh Effect for Portraits: Pro Background Blur Guide
Transform your headshots with our professional guide to bokeh effect for portraits. Learn how to add realistic background blur and light overlays online.
Deb Miller
Senior Visual Effects Artist & Photo Editor. Expert in atmospheric overlays, color grading, and digital compositing.

The difference between a "nice snapshot" and a "professional portrait" often comes down to one thing: separation.
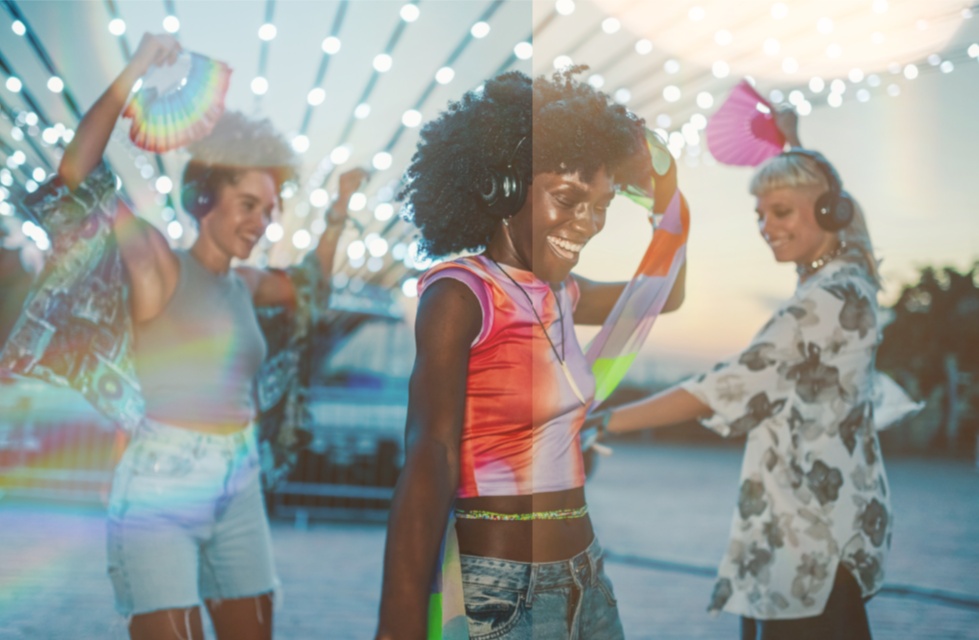
In professional photography, we use fast prime lenses (like an 85mm f/1.4) to slice the subject away from the noisy, chaotic background. This shallow depth of field creates bokeh -- the aesthetic quality of the blur. It turns a distracting chain-link fence into a creamy, abstract wash of color, and it forces viewers to lock eyes with the model.
But what if you shot your photo on a smartphone? Or what if you used a kit lens at f/5.6? The background is sharp, the subject blends in, and the magic is missing.
In 2026, you don't need to retinotouch the shoot. With the right techniques, you can add that high-end bokeh effect for portraits in post-production. But be warned: portraits are unforgiving. Unlike landscapes, where you can heavy-hand an effect, human faces require subtlety.
In this guide, I will walk you through the professional workflow for adding background blur to headshots and portraits without making them look fake.
Why Bokeh Matters More for Portraits
It is not just about making the background blurry. It is about psychology.
- Subject Isolation: Our eyes are naturally drawn to sharp, high-contrast areas. By blurring the background, you are subliminally telling the viewer, "Look here. This person is important."
- Skin Smoothing (Optical Illusion): When the background is incredibly soft, the skin texture on the subject actually appears sharper by comparison, while also looking more flattering.
- Atmosphere: A flat photo records a face. A photo with glowing bokeh lights records a moment. It adds an emotional layer - romance, nostalgia, or urban energy - that flat pixels can't convey.
As I mentioned in our complete bokeh guide, the goal isn't to obliterate the background, but to "kiss" it with light.
The 3 Best Bokeh Styles for Portraits
Not all bokeh is created equal. In ImagiTool's Bokeh Effect tool, we offer over 20 different overlay styles. For portraits, I strictly recommend staying within these three categories to maintain realism.
1. The "Natural" Look (For Corporate Headshots)
- Goal: To mimic a DSLR lens.
- Recommended Preset: Natural (
bokeh6) or Minimal (bokeh5). - Visuals: These presets feature soft, round, non-intrusive circles. They don't have "sparkles" or "rainbows." They simply suggest that there was light filtering through trees or a window in the distance.
- Best For: LinkedIn profile photos, corporate bios, and daylight portraits.
2. The "Dreamy" Look (For Weddings & Couples)
- Goal: To add romance and softness.
- Recommended Preset: Lilac Blue (
bokeh7) or Creamy Yellow (bokeh4). - Visuals: These have a larger radius and a softer edge. The colors (cool blues or warm yellows) bleed slightly into the image, acting almost like a color grading filter.
- Best For: Engagement shoots, wedding photos, and golden hour selfies.
3. The "Glamour" Look (For Fashion & Social)
- Goal: To create drama and excitement.
- Recommended Preset: Closeup (
bokeh8) or Gold Particles (bokeh2). - Visuals: High-contrast, bright lights. Think of a night shot in New York City with taxi lights blurring in the distance.
- Best For: Instagram fashion influencers, night portraits, and holiday cards.
If you are unsure which tool allows you to access these specific styles effectively, check our comparison of the 7 Best Bokeh Tools to see why we recommend specific editors for portrait work.
Step-by-Step: Applying Portrait Bokeh Like a Pro
Applying bokeh to a face is different than applying it to a product. If you cover the eyes or mouth with a light blob, you ruin the connection. Here is my exact workflow.
Step 1: Pre-Process Your Image
Before adding overlays, ensure your subject is well-lit. Bokeh adds light to the scene, so if your subject is underexposed, the effect will look pasted on. Use the Exposure tool to brighten the face slightly if needed.
Step 2: Apply the "Natural" Overlay
Open the Bokeh tool.
- Select Natural or Minimal.
- Crucial Step: Watch where the circles land. You want them framing the head (like a halo) or drifting in the background corners. You do not want a bright spot on the nose or forehead.
Step 3: Use "Flip" to clear the Face
In ImagiTool, you can press H (Horizontal Flip) or V (Vertical Flip) to instantly mirror the overlay. Keep flipping it until the center of the face is relatively clear of bright spots. This is much faster than erasing manually.
Step 4: Blend Mode Selection (The Secret Sauce)
For portraits, the Blend Mode changes everything.
- Screen (Standard): Good for night shots. It keeps the lights bright and white.
- Soft Light (Pro Choice): Use this for daylight portraits. It blends the bokeh texture into the existing background colors rather than sitting on top of them. It creates a much more subtle, "barely there" look that professional retouchers prefer.
Step 5: Dial in the Intensity
- Corporate/Natural: Keep intensity between 30-50%. You want it felt, not seen.
- Creative/Fashion: Push it to 60-80% for that "studio lighting" vibe.
Advanced Technique: The "Bokeh Vignette"
One of my favorite tricks for portraits is using bokeh to create a vignette. Instead of darkening the corners (which can look old-fashioned), we lighten them with out-of-focus highlights.
- Choose a preset with heavy peripheral lights, like Closeup.
- Set the Blend Mode to Lighten or Screen.
- Lower the intensity to about 40%.
This creates a "circle of focus" where the center of the image (the face) remains contrasty and sharp, while the edges dissolve into dreamy light. It is an incredibly flattering look for beauty photography.
Common Mistakes to Avoid in Portrait Bokeh
Over the years, I have seen thousands of edits. These are the three instant giveaways that a photo was edited by an amateur.
1. The "Ghost" Effect
This happens when you put a bokeh overlay nicely over the background, but you forget that it also covers the subject's dark jacket or hair.
- The Fix: If the bokeh is lightening the subject's hair too much, try the Overlay blend mode, which respects the dark values of the underlying image more than Screen does.
2. Conflicting Light Direction
If the sun is hitting your model's left cheek, but the brightest bokeh flares are on the right side of the frame, the brain rejects the image as "wrong."
- The Fix: always look at the catchlights in the model's eyes. If the white reflection is at 2 o'clock, rotate your bokeh overlay so the primary light source matches that direction.
3. Sharp Bokeh on Blurry Backgrounds
If your original photo is already slightly blurry or noisy, and you add razor-sharp bokeh circles on top, the mismatch in resolution looks terrible.
- The Fix: This is rare with ImagiTool's soft-focus overlays, but if you encounter it, reduce the opacity. Lower opacity helps hide the sharpness difference between the layer and the photo.
Conclusion
Great portrait photography is about emotion. When we look at a face, we want to feel a connection. A messy, sharp background breaks that connection by giving our eyes too much data to process.
By carefully adding a portrait background blur, you strip away the noise and give your subject the stage they deserve. It is a small edit - often taking less than 60 seconds - but it elevates the perceived value of your photography instantly.
Don't let a busy background ruin a great expression. Try the Bokeh Effect tool on your next headshot and see how much stronger the image becomes.

