Bokeh Effect: How to Add Dreamy Background Blur Online
Learn how to add a dreamy bokeh effect to your photos online. Master background blur, light particles, and blend modes with our easy step-by-step guide.
Deb Miller
Senior Visual Effects Artist & Photo Editor. Expert in atmospheric overlays, color grading, and digital compositing.

I remember my first real "splurge" as a photographer. I dropped $800 on a prime lens, convinced it was the only way to get that creamy, blurry background - the elusive "bokeh" - that separates snapshots from professional portraits.
For weeks, I struggled. I missed focus because the depth of field was razor-thin. I couldn't get the lighting right to create those beautiful light circles. And capturing that look on a cloudy day? Impossible.
The truth is, achieving perfect bokeh in-camera requires a perfect storm of aperture, focal length, and lighting conditions. For most of us shooting on smartphones or standard lenses, that look feels out of reach.
But here is the good news: You don't need expensive gear anymore. It is actually easier, faster, and more flexible to add bokeh effect in post-production. In this guide, I'll show you exactly how to add dreamy background blur to your photos online, giving you that high-end look in seconds.
Why Bokeh Actually Matters
It’s not just about making things blurry. Bokeh is a storytelling tool.
- Subject Isolation: By blurring the background, you force the viewer's eye exactly where you want it - on your subject.
- Professional Polish: A soft, out-of-focus background instantly signals "high production value" to the viewer.
- Mood & Atmosphere: Adding glowing light particles creates romance, drama, or festive vibes that a flat photo simply lacks.
- Hiding Distractions: Got a messy background? Bokeh softens trash cans, street signs, and clutter into beautiful abstract shapes.
The "Purist" Way vs. The Efficient Way
You could achieve this by shooting with a lens at f/1.8 or lower. But that comes with risks: missing focus on the eyes, needing expensive neutral density filters for daylight shoots, and carrying heavy glass.
Alternatively, you could use complex desktop software like Photoshop. That means finding high-res overlay textures, manually masking subjects, and fiddling with adjustment layers for 20 minutes per photo.
Or, you can use a dedicated online tool designed to do just this one thing perfectly.
Step-by-Step: Adding Bokeh with ImagiTool
Using ImagiTool's Bokeh Effect tool, you can access over 20 handcrafted light overlays that mimic real lens characteristics. Here is the workflow I use for my own edits.
1. Upload Your Image
Start by opening the Bokeh Effect tool and dropping in your photo.
- Pro Tip: Photos with visible light sources in the background (streetlights, candles, fairy lights, or dappled sun through trees) typically produce the most realistic results.
2. Choose Your Overlay Style
Don't just pick the first one. Scroll through the 20+ presets to find a pattern that matches your scene's "vibe."
- For Portraits: Try Natural or Lilac Blue. These offer subtle, soft circles that frame the face without overwhelming it.
- For Products: Gold Particles and Crystal add a premium, luxury sparkle that makes jewelry and tech darker backgrounds pop.
- For Night Shots: Burn Light or Rainbow Spark can enhance urban night scenes with dramatic flares.
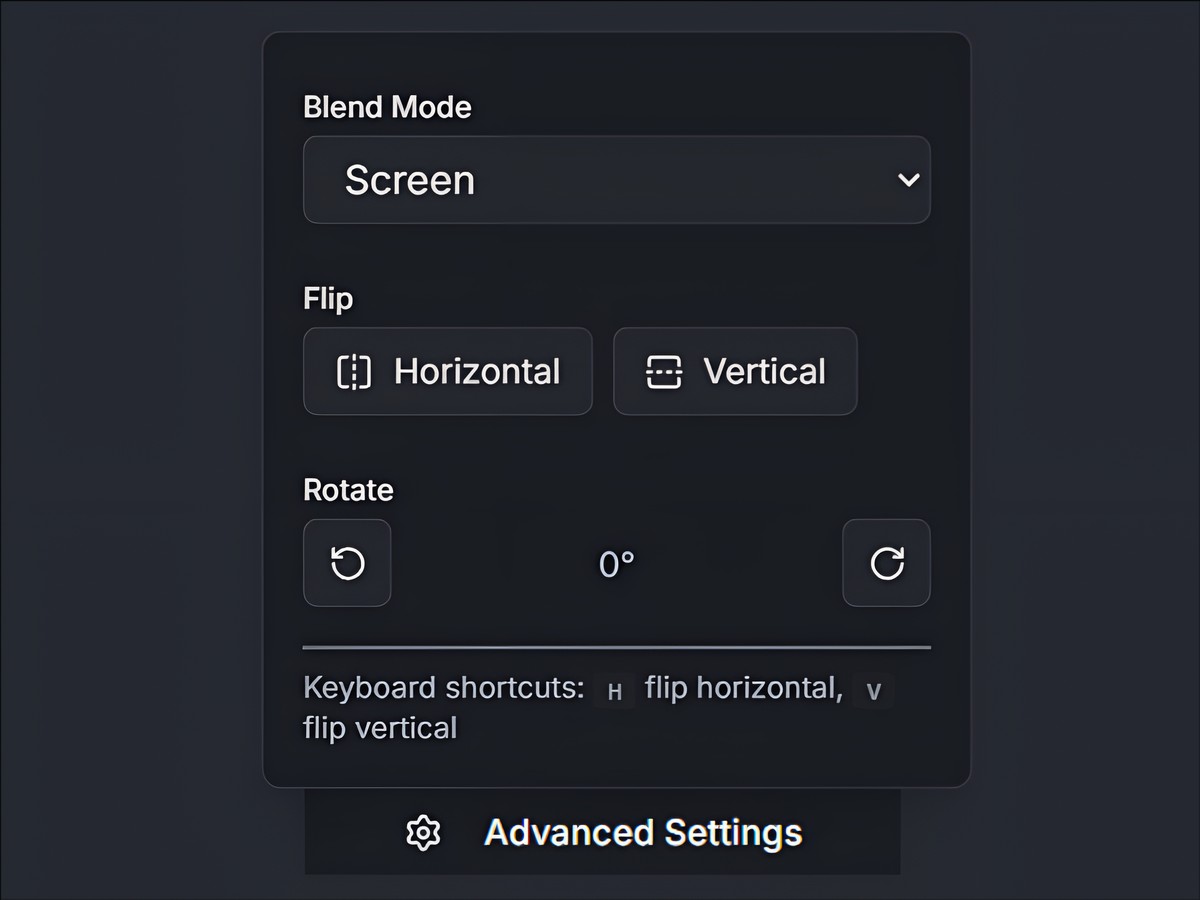
3. Master the Blend Mode
This is where amateurs get stuck. The default "Normal" mode just pastes a picture on top of your photo. To make it look real, you need Blend Modes.
- Screen (Default): The gold standard for light effects. It makes black pixels transparent and keeps white pixels bright. Use this 90% of the time.
- Overlay / Soft Light: These are fantastic for a more subtle integration, increasing contrast while adding the bokeh pattern. Great for daylight photos.
- Add / Linear Dodge: Need more intensity? Use these for blindingly bright highlights, like sparkles on jewelry.
4. Adjust Position and Intensity
Real bokeh isn't random; it follows the light.
- Intensity: A common mistake is leaving this at 100%. Dial it down to 40-70% for a natural look.
- Flip & Rotate: Is the light in your photo coming from the right? Use the Flip Horizontal (H) or Rotate controls to make sure your bokeh overlay matches the light direction. This small detail subconsciously sells the effect to the viewer.
3 Quick Tips for Realistic Results
I see many edits that look "fake" because they ignore physics. Here is how to keep it grounded.
1. Match the Color Temperature
If your photo is cool and blue (like a winter twilight), don't add a warm, orange "Burn Light" bokeh. It will look pasted on. Choose Lilac Blue or Crystal instead. Conversely, for golden hour shots, Creamy Yellow or Gold Particles are your best friends.
2. Don't Cover the Face
Bokeh should frame the subject, not obscure it. If a large light bubble lands right on someone's nose, use the Flip tools or choose a different preset like Minimal that keeps the center clear.
3. Less is Usually More
It’s tempting to layer multiple effects, but one well-chosen overlay at 60% opacity is almost always more powerful than three overlays piled on top of each other.
Conclusion
You don't need a $2,000 lens to create photos that stop the scroll. Whether you are spicing up product shots for Etsy or adding a romantic touch to wedding portraits, the right digital effects can bridge the gap between "good" and "breathtaking."
The key is subtlety - using the right blend modes and intensity to mimic how light actually behaves.
Ready to transform your images? Try the Bokeh Effect tool now and see how much difference a little background blur can make.


