Resize Image to 140x60 Pixels: The Complete 2026 Guide
Master precise 140x60 pixel resizing for government forms, job portals, and signatures. Step-by-step guide with file size optimization and format conversion.
Melanie Garcia
Senior Image Processing Engineer with 8+ years optimizing web performance

I once watched a client miss a government job application deadline because their signature was rejected 14 times. The reason? Their image was 139x60 pixels instead of 140x60 pixels. One pixel off.
That experience taught me that when portals demand exact 140x60 pixel dimensions, they mean exactly that. No rounding. No approximations. No "close enough."
If you're preparing images for government forms, job portals, banking KYC, professional licensing, or admission applications, this guide will save you from the frustration of repeated rejections and show you how to resize image to 140x60 pixels with absolute precision.
Why 140x60 Pixel Dimensions Actually Matter
Most people assume portals are just being picky. But there's real logic behind these strict requirements.
Why Portals Enforce Exact Dimensions:
- Legacy system compatibility: Many government and job portals run on databases built 10-15 years ago with fixed-width layouts that break if images don't match exact specs.
- File size control: The 140x60 dimension typically keeps file sizes under 20KB, which prevents server strain when processing thousands of daily applications.
- Consistent display: When every signature or photo is the same size, automated document generation (like admit cards or ID badges) works flawlessly.
- Database efficiency: Standardized dimensions reduce storage overhead and speed up page load times across millions of application records.
The Cost of Getting It Wrong:
- Upload failures with cryptic error messages
- Application rejections without explanation
- Wasted hours reformatting and resubmitting
- Missed deadlines for time-sensitive applications
Understanding Aspect Ratio vs Exact Pixels
Here's where most people go wrong. When you "resize" an image in most basic photo editors, they preserve aspect ratio by default. So if you upload a square photo (1000x1000) and ask it to resize to 140 pixels wide, it'll give you 140x140, not 140x60.
Key Concepts for 140x60 Resizing:
- Aspect ratio: The 140:60 ratio equals roughly 2.33:1 (a rectangular banner shape).
- Stretch vs. Crop vs. Fit: You'll need to choose how to handle images that don't match this aspect ratio.
- Resolution vs. Dimensions: DPI (dots per inch) doesn't matter for web uploads - only the pixel dimensions count.
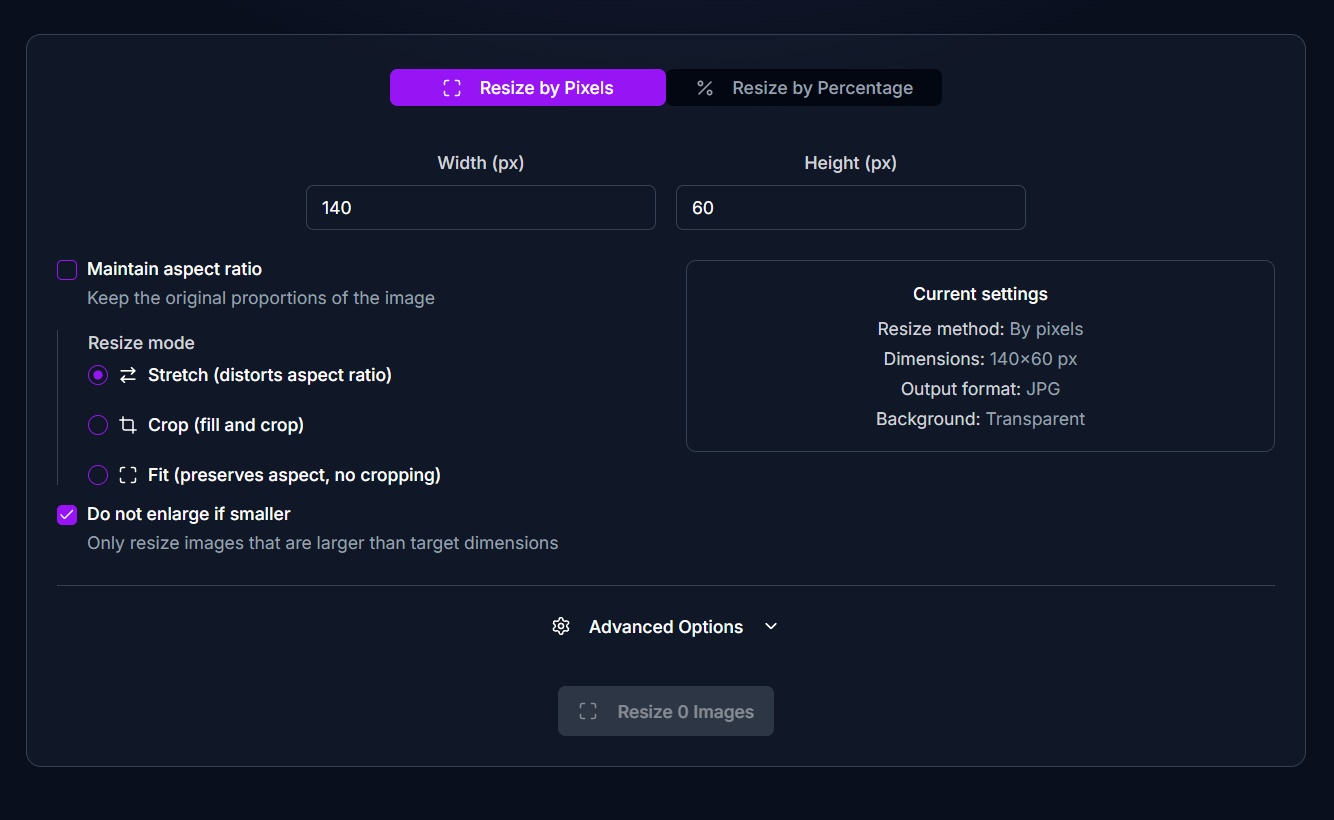
The 3 Resize Modes Explained
When your source image doesn't match the 2.33:1 aspect ratio, you have three options:
1. Stretch Mode
Distorts the image to exactly 140x60 by stretching or squashing it.
- Best for: Text-based signatures where slight distortion won't be noticeable.
- Warning: Can make faces look wide or tall if used on photos.
2. Crop Mode
Keeps the correct aspect ratio by trimming excess content, then resizes to 140x60.
- Best for: Photos where you can afford to lose edges.
- Tip: Many tools let you choose which part to keep (center, top, bottom).
3. Fit Mode (with background)
Shrinks the image to fit within 140x60 without distortion, then adds colored bars to fill gaps.
- Best for: Preserving full signature visibility with white/transparent background.
- Portal compatibility: Some portals reject images with transparent backgrounds, so test first.
How to Resize Image to 140x60 Pixels with ImagiTool
The resize image to 140x60 pixels tool is purpose-built for portal requirements. Here's the exact process:
Step 1: Upload Your Source Image
Drag and drop your signature, photo, or document. Supported formats: JPG, PNG, WebP, HEIC, TIFF.
Quality Tip: Start with the highest resolution source you have. It's easier to scale down cleanly than to upscale a small image (which causes blur).
Step 2: Set Exact Dimensions
Enter 140 for width and 60 for height. Lock the aspect ratio if your portal allows proportional images, or unlock it for exact stretch.
Portal-Specific Settings:
- Government job portals: Usually require exact 140x60, no aspect ratio lock.
- Banking KYC forms: May accept 140x60 or 150x60 - check requirements.
- Visa applications: Often need exact dimensions with transparent or white background.
Step 3: Choose Your Resize Mode
- Stretch: For text signatures where distortion won't matter.
- Crop: For scanned documents where you can trim margins.
- Fit: For handwritten signatures where every stroke must be visible.
Step 4: Optimize File Size
Many portals enforce a 20KB maximum. Use the quality slider to compress without visible blur:
- JPG: Start at 85% quality, reduce if file size exceeds limit.
- PNG: Choose PNG-8 instead of PNG-24 for smaller files (if transparency isn't needed).
- WebP: Offers 30% smaller files at equal quality, but check portal compatibility.
File Size Pro Tips:
- Remove metadata (EXIF data) to save 5-10KB.
- Use white backgrounds instead of transparent (smaller file size).
- Avoid excessive contrast or shadows (they increase compression artifacts).
Step 5: Select Background Color
If using Fit mode, choose your fill color:
- White: Safest for most portals (appears professional on documents).
- Transparent: Best for layering on forms, but some portals reject transparency.
- Black: Rarely needed unless specified by portal.
Step 6: Download Your Optimized Image
Click download and verify the output:
- Check dimensions: Right-click > Properties (Windows) or Get Info (Mac) to confirm exactly 140x60.
- Check file size: Must be under portal limit (usually 20KB).
- Visual quality: Zoom in to ensure text/signatures are sharp.
Common Portal Rejection Errors (and Fixes)
Error: "Wrong Image Dimensions"
Cause: Image is 139x60, 140x59, or other near-miss dimensions. Fix: Use a tool with pixel-perfect precision, not percentage-based scaling.
Error: "File Size Exceeds 20KB"
Cause: High-quality JPEG or PNG-24 format. Fix: Lower JPG quality to 75-80% or convert PNG to JPG. Use the resize image tool's built-in compression.
Error: "Invalid File Format"
Cause: Portal only accepts JPG, but you uploaded PNG or HEIC. Fix: Convert to JPG before resizing. Most modern tools handle format conversion automatically.
Error: "Image Appears Stretched"
Cause: You used Stretch mode on a photo that needed Crop or Fit. Fix: Re-resize using Crop mode to preserve aspect ratio, trimming edges instead.
Error: "Signature Rejected for Quality Issues"
Cause: Over-compression or upscaling from a tiny source image. Fix: Start with a high-resolution scan (at least 300 DPI), then resize down. Never upscale below 72 DPI sources.
Advanced Tips for Signature Resizing
Signatures deserve special attention since they're the most commonly rejected 140x60 images.
For Scanned Handwritten Signatures
- Scan at 300 DPI: This captures fine pen strokes clearly.
- Convert to grayscale or black/white: Reduces file size and improves clarity.
- Increase contrast: Makes ink darker and paper whiter before resizing.
- Use white background: Transparent backgrounds can show as grey boxes on some portals.
For Digital Signatures (Created in Apps)
- Export at highest resolution: Don't resize in the signature app.
- Keep thick strokes: Thin lines can vanish when scaled to 140x60.
- Test visibility: At 140x60, your signature should still be recognizable at arm's length.
For Logo/Stamp Signatures
- Use PNG for transparency: If portal allows, transparent logos look cleaner.
- Pad with margins: Leave 5-10 pixels empty on all sides to prevent cut-off.
- Check brand guidelines: Some companies require minimum logo sizes that exceed 140x60 (may need official exemption).
Batch Processing Multiple Images
If you're resizing multiple images for the same portal (e.g., signature + photo + document scan), use batch processing to save time:
- Upload all images at once.
- Apply identical settings: 140x60, same quality, same format.
- Use filename templates: Name outputs systematically (signature-140x60.jpg, photo-140x60.jpg).
- Download as ZIP: Get all files in one click.
This workflow is especially useful for job applications requiring multiple image uploads with identical specifications.
File Format Decision Guide
When to Use JPG:
- Portal explicitly requires JPG
- Image has gradients, photos, or complex colors
- File size is the primary concern
When to Use PNG:
- Portal allows any format
- Image has transparency (logo, digital signature)
- Image is simple (black ink on white background - compresses smaller)
When to Use WebP:
- Portal modern enough to support it (rare in government systems)
- You need maximum quality at minimum file size
- You're preparing web content, not portal uploads
Avoid TIFF/BMP/RAW:
- These formats are almost never accepted by portals
- They produce files 10x larger than JPG with no benefit for 140x60 dimensions
Portal-Specific Requirements Reference
While specific portal requirements change frequently, these general patterns hold true:
Government Job Applications (India, US, UK):
- Dimensions: Exactly 140x60 or 150x60 pixels
- File size: Under 20KB (sometimes 50KB)
- Format: JPG only (PNG rarely accepted)
- Background: White preferred
Banking KYC/ID Verification:
- Dimensions: 140x60 to 200x100 (varies by country)
- File size: 50KB typical maximum
- Format: JPG or PNG accepted
- Background: White or transparent
Professional Licensing Boards:
- Dimensions: Often 140x60 for signatures, larger for photos
- File size: Moderate limits (50-100KB)
- Format: Usually flexible
- Background: White standard
Visa/Passport Applications:
- Dimensions: Strict compliance required (varies by country)
- File size: Low limits (10-50KB)
- Format: JPG standard
- Background: White mandatory
Always check the specific portal's technical requirements page before submitting.
Quality vs. File Size Balance
This is the trickiest part of portal image prep. Here's my tested approach:
Starting Point:
- Dimensions: Exactly 140x60 pixels
- Format: JPG
- Quality: 85%
- Check file size
If over 20KB, reduce in this order:
- Lower quality to 80% (minimal visible impact)
- Lower quality to 75% (slight softness in gradients)
- Lower quality to 70% (only if absolutely necessary)
- Convert complex images to black/white or grayscale (drastic file size reduction)
- Consider using Fit mode with white background instead of transparent (saves 3-5KB)
If under 5KB:
- You've over-compressed. Increase quality back to 85-90% to avoid rejection for "poor image quality."
Visual Quality Check:
- Zoom to 200% and check that text/lines are still crisp
- Print a test copy - if it looks good on paper, it'll work on-screen
- Ask someone else if they can clearly read/recognize the signature
Prevent-Enlarge Safeguard Explained
One underrated feature in professional resize tools is the prevent-enlarge option. Here's why it matters:
If you upload a 100x40 pixel signature and ask the tool to resize to 140x60, it has to upscale (make the image bigger). This always causes blur because the tool is inventing pixels that didn't exist.
What Prevent-Enlarge Does:
- If source is smaller than 140x60, it adds white/transparent padding instead of stretching
- Preserves original sharpness
- Prevents the "blurry upscale" problem
When to Use It:
- You're scanning documents at low resolution
- You're working with existing small images you can't re-capture
- Portal is strict about quality (rejects blurry submissions)
When to Disable It:
- You're certain your source is high-resolution
- You want to always get exactly 140x60 filled (even if blurry)
- You're resizing logos that look fine when scaled up
Metadata and Privacy Considerations
When you resize an image, hidden data (EXIF metadata) can stay embedded:
- GPS location
- Camera model and settings
- Date/time taken
- Copyright information
- Editing software used
Privacy Tip: Use a tool that strips metadata during resize. Government portals don't need to know where your signature was scanned or what device you used.
File Size Benefit: Removing EXIF data can save 5-15KB, which might be the difference between a 21KB rejected image and a 19KB accepted one.
Testing Your Resized Image Before Submission
Before uploading to the actual portal, test your image:
- Dimension verification: Use an online pixel checker or image properties to confirm exactly 140x60.
- File size check: Ensure it's under the portal's limit with buffer room (aim for 18KB if limit is 20KB).
- Visual quality test: Open in a photo viewer at 100% zoom - should be sharp and clear.
- Format confirmation: Check file extension matches portal requirements (.jpg vs .jpeg vs .png).
- Mock upload: If possible, use a test portal or draft application to ensure no errors.
Pro Tip: Save your final image with a descriptive filename like Signature_140x60_18KB.jpg so you can easily find it later if the portal times out and you need to re-upload.
Bulk Filename Templating for Multiple Submissions
If you're applying to multiple portals with similar requirements, standardize your naming:
Template Options:
{original-name}_140x60.jpg(preserves source filename)Signature_140x60_{date}.jpg(adds timestamp){base-name}_{dimensions}.jpg(custom prefix)
This makes it easy to track which image version you've uploaded where, especially if you have multiple resize jobs (140x60, 150x60, 200x100) for different portals.
Troubleshooting Common Issues
My signature looks blurry after resizing
Cause: Either over-compression or upscaling from a tiny source. Solution: Re-scan signature at 300 DPI or higher, then resize down. Use 85% quality for JPG.
Portal says "dimensions invalid" but my file is 140x60
Cause: Some portals read metadata dimensions instead of actual pixel dimensions. Solution: Strip all metadata and re-save. Use a tool that writes clean dimension data.
File size won't go below 25KB no matter what I do
Cause: Complex image with gradients, photos, or textures. Solution: Convert to pure black/white (not grayscale) if it's a signature. This massively reduces file size.
Image uploads but appears distorted on portal
Cause: Portal is applying its own resize on top of yours. Solution: Upload at exact 140x60 with no room for portal to rescale. Use "Stretch" mode to fill the exact dimensions.
Can't find the right aspect ratio setting
Cause: Tool is trying to preserve proportions. Solution: Look for "Stretch to fit," "Ignore aspect ratio," or "Exact dimensions" option. Unlock the dimension lock icon if present.
Conclusion
Resizing images to exact 140x60 pixel dimensions isn't just a technical hurdle - it's a critical step in modern digital applications. With portals becoming stricter about image specifications, having the right tool and knowledge saves hours of frustration.
Use the resize image to 140x60 pixels tool to get pixel-perfect results in seconds, with built-in file size optimization, format conversion, and quality controls. No more rejected submissions. No more missed deadlines.
Ready to resize your images with precision? Get started now and upload with confidence.
Frequently Asked Questions
How to resize image to 140x60 pixels online free?
Use the resize image to 140x60 pixels tool - upload your image, set dimensions to exactly 140x60, choose your resize mode (stretch/crop/fit), optimize file size if needed, and download. The entire process takes under 30 seconds with no signup required.
Why is my signature getting rejected on job portals?
The most common reasons are: wrong dimensions (139x60 instead of 140x60), file size over 20KB, wrong format (PNG instead of JPG), or poor quality from over-compression. Use a tool with pixel-perfect precision and quality tuning to avoid these issues.
How to resize signature to 140x60 under 20KB?
Start with a high-resolution scan (300 DPI), resize to exactly 140x60 pixels, save as JPG at 85% quality, and check file size. If over 20KB, lower quality to 75-80% or convert to pure black/white instead of grayscale. The resize image tool handles this automatically.
What is the best format for 140x60 signature - JPEG or PNG?
For most government and job portals, JPEG (JPG) is best because it produces smaller file sizes (critical for 20KB limits) and is universally accepted. Use PNG only if the portal specifically allows it and you need transparency. Avoid BMP, TIFF, or WebP for portal submissions.
How to keep transparency when resizing to 140x60?
Use PNG format instead of JPG, and ensure your resize tool supports transparency preservation. However, be aware that many portals reject transparent backgrounds (they appear as grey boxes on forms). White backgrounds are safer for most applications.
Can I use the same 140x60 image for multiple portals?
Yes, if they have identical requirements (same dimensions, file size limit, and format). However, always verify each portal's specific technical requirements - some may need 150x60 or have different file size limits. Save portal-specific versions with descriptive filenames.
How to avoid pixelation when resizing small images to 140x60?
You can't truly avoid it if your source is smaller than 140x60 - upscaling always causes blur. Instead, use "Prevent-Enlarge" mode to add white padding around your small image rather than stretching it. Better yet, re-scan or re-capture your signature at higher resolution.
What DPI should I use for 140x60 pixel images?
DPI (dots per inch) is irrelevant for web/portal uploads - only pixel dimensions matter. Portals measure in pixels (140x60), not inches. However, if you're scanning a physical signature to resize later, scan at 300 DPI or higher to preserve quality during downscaling.


